

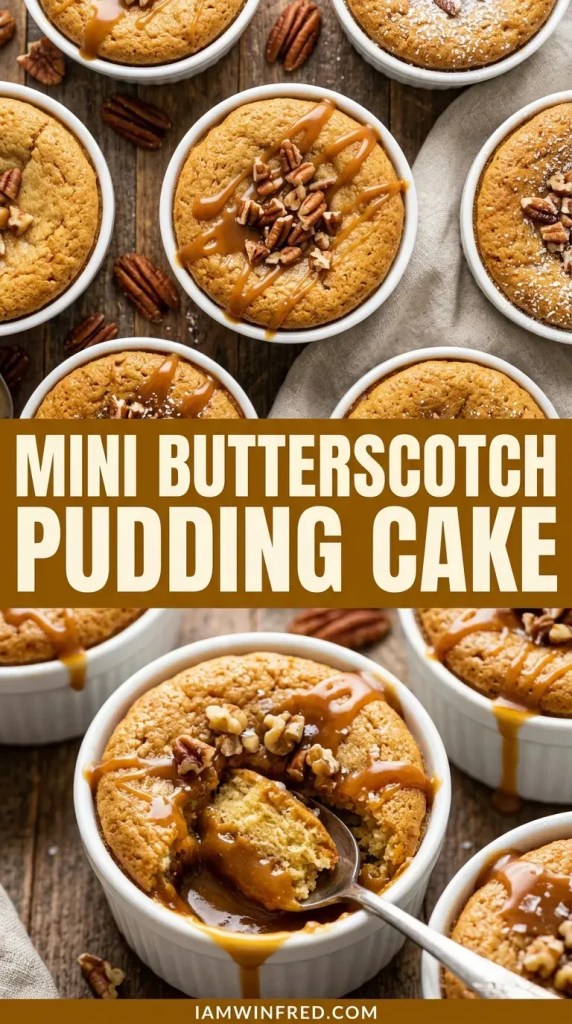
Mini butterscotch pudding cakes are the kind of dessert that makes everyone at the table go quiet for a second.
Each little ramekin bakes up with a tender, golden cake on top and a pool of warm butterscotch sauce hiding underneath.
I first made these on a rainy Sunday when I wanted something cozy but did not want to fuss with a layered cake.
A handful of pantry staples, one bowl, and a kettle of hot water were all it took.
The magic happens in the oven, where the brown sugar topping sinks to the bottom and turns into sauce all on its own.
You get cake and sauce in one dish, with no extra pot on the stove.
If you love self-saucing desserts as much as I do, you will also like my mini lemon pudding cakes, which use the same clever technique with a bright citrus twist.
| Quick Recipe Summary | |
|---|---|
| Prep Time | 15 minutes |
| Cook Time | 25 to 28 minutes |
| Total Time | 40 to 43 minutes |
| Servings | 6 mini cakes |
| Difficulty Level | Easy |
Why You’ll Love This Mini Butterscotch Pudding Cakes
These little cakes deliver big comfort with very little effort. Here is what makes them a regular in my kitchen.
- Cake and sauce in one step: The topping turns into a silky butterscotch sauce while the batter bakes into a soft sponge, so there is nothing extra to cook.
- Simple pantry ingredients: Flour, brown sugar, butter, milk, and baking powder are all you really need.
- Perfect portions: Every person gets their own warm ramekin, which makes serving feel special without any slicing or plating.
- Ready in about 40 minutes: You can mix, bake, and be eating dessert before the dinner dishes are even dry.
- Great for beginners: There is no whipping, no folding, and no water bath to babysit.
- Deep, cozy flavor: Brown sugar and butter give you that old-fashioned butterscotch taste that never goes out of style.
You might also enjoy: Mini Chocolate Cheesecakes
Ingredients
Everything here is simple and easy to find, and the dark brown sugar in the topping is what gives the sauce its deep, buttery flavor.
If you ever want extra butterscotch flavor, my homemade butterscotch pudding uses the same brown sugar and butter base.
- 1 tablespoon unsalted butter, softened (for greasing the ramekins)
- 1 cup all-purpose flour (for the batter)
- 1/2 cup packed light brown sugar (for the batter)
- 2 teaspoons baking powder (for the batter)
- 1/2 teaspoon fine salt (for the batter)
- 1/2 cup whole milk, at room temperature (for the batter)
- 4 tablespoons unsalted butter, melted and slightly cooled (for the batter)
- 2 teaspoons pure vanilla extract (for the batter)
- 1/2 cup packed dark brown sugar (for the topping)
- 1 tablespoon unsalted butter (for the topping, melted into the hot water)
- 1 1/4 cups boiling water (for the topping)
- 1/4 teaspoon flaky sea salt (for finishing, divided among the cakes)
- Sweetened whipped cream or vanilla ice cream, for serving (optional)
Kitchen Equipment Needed
You do not need anything fancy, but a few good tools help these cakes bake evenly and come out looking bakery-worthy.
- Six 6-ounce ceramic ramekins
- A rimmed baking sheet to hold the ramekins and catch any bubbling sauce
- An electric kettle (or a small saucepan) for boiling the water
- A medium mixing bowl
- A whisk
- A rubber spatula
- A heat-safe liquid measuring cup with a spout for mixing and pouring the topping
- A cookie scoop for portioning the batter evenly
- An oven thermometer to double-check your oven temperature
- A cooling rack for resting the baked cakes
- Measuring cups and spoons
Read Also: Butterscotch Pie Recipe
Recommended Products for This Recipe
These are my personal recommendations based on years of baking in my own kitchen.
The ramekins also work beautifully for my mini lemon cheesecakes.
1. Le Creuset Stoneware Ramekins Set
I reach for these ramekins every time I bake individual desserts because they heat evenly and hold warmth long after they leave the oven.
The glazed interior releases batter easily and cleans up fast, even with sticky brown sugar sauce.
They also look lovely on the table, so you can serve straight from the oven.
2. Nordic Ware Half Sheet Pan
A sturdy, rimmed sheet pan keeps your ramekins steady and catches any sauce that bubbles over the edge.
This one resists warping at 350°F, which means the ramekins sit flat and bake at the same pace.
It is one of the most-used pans in my kitchen for everything from cookies to roasted vegetables.
3. Nielsen-Massey Madagascar Bourbon Pure Vanilla Extract
In a simple recipe like this one, the vanilla really shows up in every bite.
A good pure vanilla rounds out the butterscotch flavor and adds a warm, creamy note that imitation vanilla cannot match.
A small bottle goes a long way for all your baking.
4. Maldon Sea Salt Flakes
A tiny pinch of flaky salt on top of a warm butterscotch cake is one of those small touches that makes people ask what your secret is.
The crisp, clean crunch balances the sweetness and makes the butterscotch taste even richer. I keep a box in my pantry at all times.

Step-by-Step Instructions: How to Make Mini Butterscotch Pudding Cakes
1. Preheat the Oven and Prepare the Ramekins
- Place an oven rack in the middle position and preheat your oven to 350°F (175°C).
- Use the 1 tablespoon of softened butter to grease the inside of six 6-ounce ramekins, covering the bottom and the sides.
- Set the greased ramekins on a rimmed baking sheet, leaving a little space between each one.
- Keep the baking sheet right next to your workspace so you can fill the ramekins in place and avoid carrying them around.
2. Melt the Butter and Get Your Ingredients Ready
- Melt the 4 tablespoons of butter for the batter in the microwave in 20 second bursts, or in a small saucepan over low heat.
- Set the melted butter aside for a few minutes so it cools slightly and does not scramble the milk later.
- Measure the milk and let it sit on the counter so it loses its chill.
- Fill your kettle with water and get it ready to boil, since you will need 1 1/4 cups of boiling water in a few minutes.
3. Whisk the Dry Ingredients
- In a medium mixing bowl, add the 1 cup of all-purpose flour, 1/2 cup of packed light brown sugar, 2 teaspoons of baking powder, and 1/2 teaspoon of fine salt.
- Spoon the flour into your measuring cup and level it off with a knife instead of scooping, so you do not end up with too much flour.
- Whisk everything together for about 30 seconds until the mixture looks even in color.
- Press out any brown sugar lumps with the back of a spoon, because they will not dissolve once the batter is mixed.
4. Mix the Batter
- Pour the 1/2 cup of room temperature milk, the cooled melted butter, and the 2 teaspoons of vanilla extract into the dry ingredients.
- Stir with a rubber spatula just until no dry flour remains. The batter will be thick and stiff, and that is exactly what you want.
- Stop mixing as soon as it comes together, since overmixing can make the cakes tough.
- Scrape down the sides of the bowl once to catch any hidden pockets of flour.
5. Portion the Batter into the Ramekins
- Divide the batter evenly among the six prepared ramekins, using about 1/4 cup (4 tablespoons) in each one.
- A cookie scoop makes this quick and keeps the portions even, so every cake bakes at the same speed.
- Use the back of a spoon or a damp fingertip to gently spread the batter into an even layer.
- Do not worry if the batter looks like too little. It will rise as it bakes.
6. Make the Butterscotch Topping
- Bring the water to a full boil, then measure out 1 1/4 cups.
- Add the 1/2 cup of packed dark brown sugar and the 1 tablespoon of butter to a heat-safe liquid measuring cup.
- Carefully pour the boiling water over the sugar and butter.
- Stir with a whisk for about 30 seconds until the sugar dissolves completely and the butter melts. The mixture should look like thin, glossy caramel colored water.
7. Pour the Topping Over the Batter
- Hold a spoon upside down over one ramekin, with the back of the spoon just above the batter.
- Slowly pour about 1/4 cup of the hot topping over the back of the spoon so it lands gently on the batter instead of cutting a hole in it.
- Repeat with the remaining ramekins, giving the topping a quick stir between each pour so the sugar stays evenly mixed.
- Do not stir the ramekins after pouring. The batter and topping need to stay separate so they can swap places in the oven.
8. Bake the Pudding Cakes
- Carefully slide the baking sheet into the center of the oven, keeping the ramekins level so the liquid does not slosh.
- Bake for 25 to 28 minutes, and start checking at the 25 minute mark.
- The cakes are done when the tops are golden, slightly cracked, and set to the touch, and you can see thick sauce bubbling around the edges.
- Avoid opening the oven door during the first 20 minutes so the cakes rise evenly.
9. Rest, Finish, and Serve
- Use oven mitts to remove the baking sheet and move the ramekins to a cooling rack.
- Let the cakes rest for 5 minutes so the sauce thickens slightly and does not burn anyone’s tongue.
- Sprinkle a few flakes of the 1/4 teaspoon of flaky sea salt over the tops, dividing it evenly among the six cakes.
- Serve warm, right in the ramekins, with a spoonful of sweetened whipped cream or a scoop of vanilla ice cream melting over the top.
For another self-saucing treat, try: Slow Cooker Caramel Apple Pudding Cake
Tips for The Best Mini Butterscotch Pudding Cakes
These cakes are very forgiving, but a few small habits will give you a softer cake and a silkier sauce every time.
If you need a shortcut for a crowd, my cake mix pudding cake uses the same easy idea.
- Use boiling water: Hot water dissolves the sugar quickly and helps the sauce form at the bottom as the cakes bake.
- Pour over the back of a spoon: This spreads the liquid gently so the batter keeps its shape.
- Do not stir after pouring: Mixing the layers together will give you a dense, soggy cake instead of cake on top and sauce below.
- Pick dark brown sugar for the topping: It has more molasses, which gives the sauce a deeper butterscotch flavor.
- Check your oven temperature: An oven that runs hot can dry out the cake and reduce the sauce, so an oven thermometer is worth it.
- Do not overbake: Pull the ramekins out when the tops are set and the edges are bubbling, because extra time cooks away the sauce.
- Always use a rimmed baking sheet: It catches spills and makes moving the hot ramekins much safer.
- Serve them warm: The sauce is at its silkiest in the first 20 minutes out of the oven.
Serving Suggestions
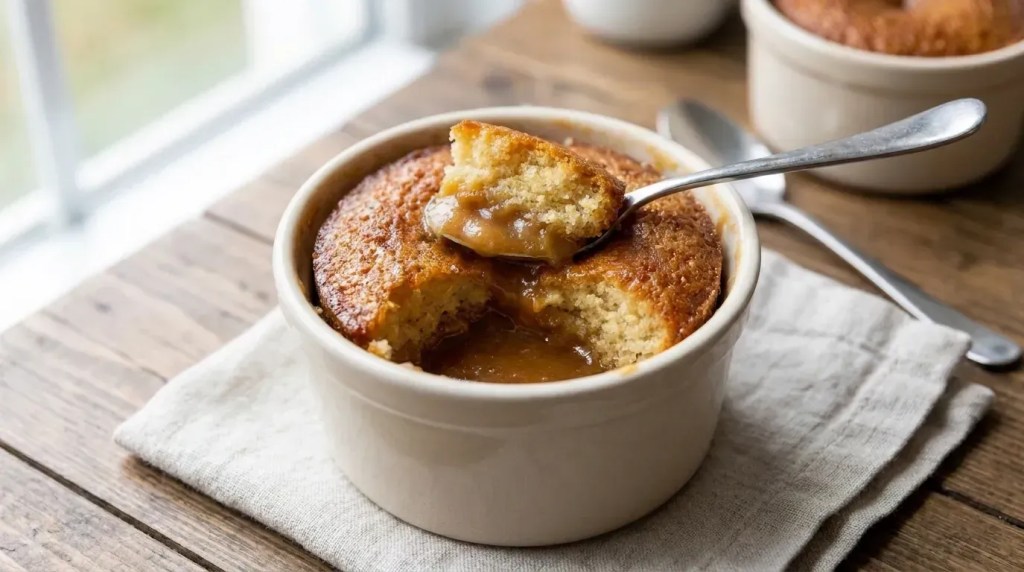
These mini cakes are delicious on their own, but a cold or creamy topping takes them over the top.
Here are my favorite ways to serve them.
- A big spoonful of sweetened whipped cream for a light, cloud-like finish
- A scoop of vanilla bean ice cream that slowly melts into the warm sauce
- A scoop of coffee ice cream, which pairs beautifully with butterscotch
- A sprinkle of toasted pecans or walnuts for crunch
- A drizzle of extra warm butterscotch sauce for true sauce lovers
- A hot cup of coffee or black tea on the side for a cozy dessert night
For a creamy scoop on the side, try: Peach Ice Cream
Variations of Mini Butterscotch Pudding Cakes
Once you have made the classic version, it is easy to change things up with a few simple additions.
For a chocolate lover’s twist, my molten lava cake is another dessert with a gooey center.
- Butterscotch chip cakes: Fold 1/4 cup of butterscotch chips into the batter for little pockets of melted sweetness.
- Toffee crunch: Sprinkle a tablespoon of toffee bits over the batter before pouring on the topping.
- Coffee butterscotch: Dissolve a teaspoon of instant coffee in the hot water for a mocha-like depth.
- Pecan butterscotch: Scatter a tablespoon of chopped toasted pecans over each ramekin before baking.
- Spiced version: Whisk 1/2 teaspoon of cinnamon into the dry ingredients for a fall-friendly twist.
- Bourbon butterscotch: Replace 1 tablespoon of the boiling water with a tablespoon of bourbon for an adult dessert.
- Dairy-free option: Use unsweetened plant milk and melted vegan butter in place of the milk and butter.
Storage and Reheating
These cakes are best the day they are baked, but leftovers keep well if you store them properly.
The sauce will soak into the cake as it sits, which still tastes wonderful once reheated.
- Refrigerator: Cover the ramekins tightly with plastic wrap, or move the cakes to airtight glass containers, and refrigerate for up to 3 days.
- Freezer: Wrap the cooled cakes individually and freeze for up to 1 month, then thaw overnight in the refrigerator.
- Microwave reheating: Heat one cake for 20 to 30 seconds until warm in the center.
- Oven reheating: Cover the ramekin with foil and warm at 300°F for about 10 minutes.
- Refresh the sauce: Spoon a little warm water or extra butterscotch sauce over the top if the cake seems dry after reheating.
Read Also: Salted Caramel Brownies Recipe
Nutritional Facts
These numbers are rough estimates for one mini cake, made without any whipped cream or ice cream.
Exact values will vary with the brands and ingredients you use.
- Calories: About 305
- Carbohydrates: About 50 g
- Total fat: About 10 g
- Protein: About 3 g
- Sugar: About 34 g
- Sodium: About 260 mg
- Fiber: About 1 g
If you are tracking sweet treats through the week, my classic blondie recipe shares the same brown sugar and butter flavor base, so you can compare notes.
Health Benefits of Key Ingredients
This is a dessert, so I think of it as a treat and not a health food, but a few ingredients do bring something to the table.
Here is a quick look at what is inside.
- Whole milk: Provides calcium, protein, and vitamin D (when fortified), which support strong bones.
- All-purpose flour: Supplies carbohydrates for quick energy, and enriched flour also contributes iron and B vitamins.
- Butter: Delivers fat-soluble vitamins like vitamin A, plus the richness that makes this dessert so satisfying in a small portion.
- Brown sugar: Contains a small amount of minerals from molasses, though it is still sugar and best enjoyed in moderation.
- Pure vanilla extract: Adds big flavor with almost no calories, which can help you feel satisfied with a smaller amount of sugar.
For a lighter option, try: Mini Lime Cream Pie Cups
FAQs About Mini Butterscotch Pudding Cakes
1. What is a pudding cake?
A pudding cake is a dessert that separates as it bakes into a soft cake layer on top and a warm sauce layer on the bottom.
The sauce forms when a hot sugar and water mixture is poured over the batter before it goes into the oven.
2. Can I make mini butterscotch pudding cakes ahead of time?
You can mix the batter and portion it into ramekins up to 2 hours ahead, but wait to pour on the hot topping until right before baking.
You can also bake them a day early and reheat them gently, though they taste best fresh from the oven.
3. Why is there no sauce at the bottom of my cakes?
The most common reasons are overbaking, using water that was not hot enough, or stirring the topping into the batter.
Bake just until the tops are set and the edges are bubbling, and pour the topping gently without mixing.
4. Can I bake this in one baking dish instead of ramekins?
Yes, pour all of the batter into a greased 8-inch baking dish, add the topping the same way, and bake for 30 to 35 minutes.
If you enjoy desserts that separate into layers while baking, my lemon custard cake is a fun one to try next.
5. Is butterscotch the same as caramel?
They are close cousins, but not the same. Butterscotch is made with brown sugar and butter, while caramel is usually made by melting white sugar until it turns amber.
Butterscotch has a deeper, more molasses-like flavor, which is exactly what makes these cakes so cozy.

Mini Butterscotch Pudding Cakes
Ingredients
- 1 tablespoon unsalted butter softened, for greasing the ramekins; 14g
- 1 cup all-purpose flour 120g
- 1/2 cup packed light brown sugar 100g
- 2 teaspoons baking powder 8g
- 1/2 teaspoon fine salt 3g
- 1/2 cup whole milk 120ml, at room temperature
- 4 tablespoons unsalted butter 56g, melted and slightly cooled
- 2 teaspoons pure vanilla extract 10ml
- 1/2 cup packed dark brown sugar 100g
- 1 tablespoon unsalted butter 14g, melted into the hot water
- 1 1/4 cups boiling water 300ml
- 1/4 teaspoon flaky sea salt divided among the cakes
- sweetened whipped cream or vanilla ice cream for serving, optional
Equipment
- Six 6-ounce ceramic ramekins
- Rimmed baking sheet to hold the ramekins and catch any bubbling sauce
- Electric kettle (or a small saucepan) for boiling the water
- Medium mixing bowl
- Whisk
- Rubber spatula
- Heat-safe liquid measuring cup with a spout for mixing and pouring the topping
- Cookie scoop for portioning the batter evenly
- Oven thermometer to double-check your oven temperature
- Cooling rack for resting the baked cakes
- Measuring cups and spoons
Method
- Place an oven rack in the middle position and preheat your oven to 350°F (175°C). Use the softened butter to grease the inside of six 6-ounce ramekins, covering the bottom and sides.
- Melt the 4 tablespoons of butter for the batter in the microwave in 20-second bursts or in a small saucepan over low heat. Set aside to cool slightly and let the milk sit on the counter to lose its chill. Fill your kettle and get it ready to boil.
- In a medium mixing bowl, whisk together the flour, light brown sugar, baking powder, and fine salt for about 30 seconds until even in color. Press out any brown sugar lumps with the back of a spoon.
- Pour the room temperature milk, cooled melted butter, and vanilla extract into the dry ingredients. Stir with a rubber spatula just until no dry flour remains. The batter will be thick and stiff, which is exactly what you want.
- Divide the batter evenly among the six prepared ramekins, using about 1/4 cup (4 tablespoons) in each one. Use the back of a spoon or a damp fingertip to gently spread the batter into an even layer.
- Bring the water to a full boil and measure out 1 1/4 cups. Add the dark brown sugar and 1 tablespoon of butter to a heat-safe liquid measuring cup, then carefully pour the boiling water over them. Stir for about 30 seconds until the sugar dissolves completely and the butter melts.
- Hold a spoon upside down over one ramekin, with the back of the spoon just above the batter. Slowly pour about 1/4 cup of the hot topping over the back of the spoon so it lands gently on the batter. Repeat with the remaining ramekins, giving the topping a quick stir between each pour. Do not stir the ramekins after pouring.
- Carefully slide the baking sheet into the center of the oven, keeping the ramekins level so the liquid does not slosh. Bake for 25 to 28 minutes, starting to check at the 25-minute mark. The cakes are done when the tops are golden, slightly cracked, and set to the touch, with thick sauce bubbling around the edges.
- Use oven mitts to remove the baking sheet and move the ramekins to a cooling rack. Let the cakes rest for 5 minutes so the sauce thickens slightly. Sprinkle flaky sea salt over the tops, dividing it evenly among the six cakes.
- Serve warm, right in the ramekins, with a spoonful of sweetened whipped cream or a scoop of vanilla ice cream melting over the top.
Nutrition
Notes
- Use boiling water: Hot water dissolves the sugar quickly and helps the sauce form at the bottom as the cakes bake.
- Pour over the back of a spoon: This spreads the liquid gently so the batter keeps its shape.
- Do not stir after pouring: Mixing the layers together will give you a dense, soggy cake instead of cake on top and sauce below.
- Pick dark brown sugar for the topping: It has more molasses, which gives the sauce a deeper butterscotch flavor.
- Check your oven temperature: An oven that runs hot can dry out the cake and reduce the sauce, so an oven thermometer is worth it.
- Do not overbake: Pull the ramekins out when the tops are set and the edges are bubbling, because extra time cooks away the sauce.
- Always use a rimmed baking sheet: It catches spills and makes moving the hot ramekins much safer.
- Serve them warm: The sauce is at its silkiest in the first 20 minutes out of the oven.
- Make ahead: Mix the batter and portion it into ramekins up to 2 hours ahead, but wait to pour on the hot topping until right before baking.
- Storage: Cover the ramekins tightly and refrigerate for up to 3 days. Reheat one cake in the microwave for 20 to 30 seconds, or cover with foil and warm at 300°F for about 10 minutes.
- Freezer: Wrap the cooled cakes individually and freeze for up to 1 month, then thaw overnight in the refrigerator.
- Variations: Fold 1/4 cup butterscotch chips into the batter, sprinkle toffee bits or chopped toasted pecans over the batter, dissolve a teaspoon of instant coffee in the hot water, whisk 1/2 teaspoon cinnamon into the dry ingredients, or replace 1 tablespoon of the boiling water with bourbon.
- Dairy-free option: Use unsweetened plant milk and melted vegan butter in place of the milk and butter.
Private Notes
Tried this recipe?
Let us know how it was!Conclusion
These mini butterscotch pudding cakes are proof that a simple dessert can feel truly special.
A few pantry ingredients, a splash of hot water, and a little patience in the oven give you warm cake and silky sauce in every bite.
I hope you give them a try this week and love them as much as my family does.
If you make them, leave a comment below and share a photo, because I would love to see how yours turn out.
Recommended:
- Maple Pecan Blondie Bites
- Chocolate Peanut Butter Pudding Pie Recipe
- Boston Cream Pie Bites
- Lemon Chess Pie Bites Recipe
- Banana Pudding Pie Recipe


