

Sushi rice is the part of sushi that most people overlook, but it’s actually the ingredient that makes or breaks the whole dish.
This sushi rice recipe gives you that glossy, slightly sticky, perfectly seasoned rice you get at your favorite sushi restaurant, made right in your own kitchen with just a handful of ingredients.
Once you get the hang of the rinsing, cooking, and seasoning steps, you’ll be able to whip up restaurant-quality sushi rice any night of the week.
| Quick Recipe Summary | |
|---|---|
| Prep Time | 15 minutes |
| Cook Time | 20 minutes |
| Total Time | 50 minutes |
| Servings | 4 (about 4 cups cooked rice) |
| Difficulty Level | Easy |
This pairs wonderfully with a batch of my Fried Rice Recipe if you want two completely different ways to use up extra short grain rice this week.
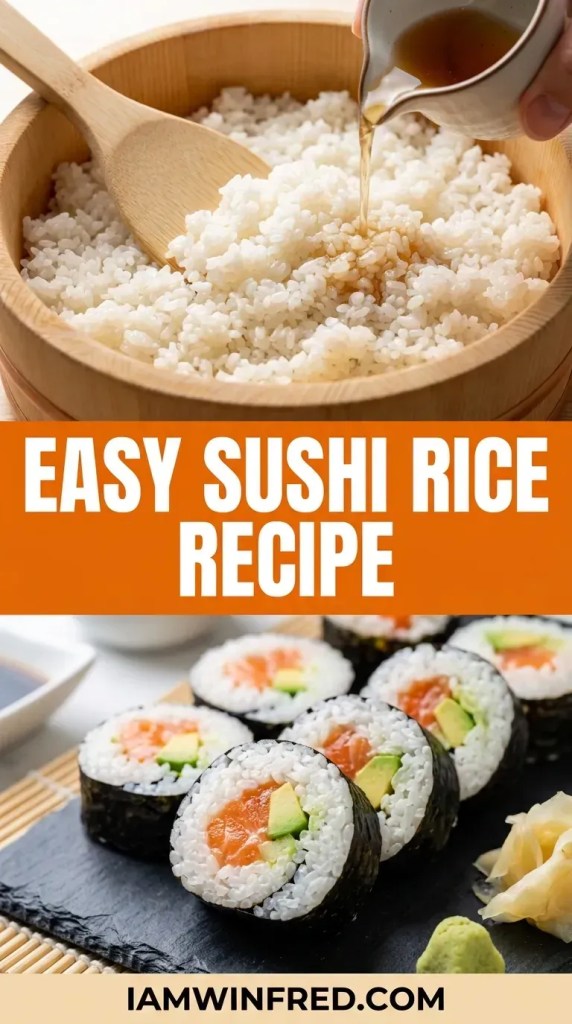
Why You’ll Love This Sushi Rice Recipe
This recipe strips sushi rice down to the basics, so there’s nothing complicated standing between you and a bowl of glossy, perfectly seasoned rice.
It works for sushi rolls, nigiri, poke bowls, or just a simple rice bowl on a busy weeknight.
Once you learn the ratios, you’ll never need to buy pre-seasoned sushi rice again.
- Only 5 ingredients needed, most of which you likely already have
- Works with a rice cooker, Instant Pot, or a regular pot on the stove
- Perfectly balanced sweet and tangy flavor every single time
- A budget friendly way to bring sushi night home instead of ordering out
- Freezes well, so you can prep rice ahead of a party or a big sushi spread
Another favorite of mine: Teriyaki Chicken Stir Fry Recipe, which uses the same style of Japanese pantry staples.
Ingredients
You only need a few ingredients to make authentic sushi rice, and most of them are shelf stable pantry staples once you have them on hand.
- 2 cups short grain sushi rice
- 2 1/4 cups cold water
- 1 small piece dried kombu, optional (dried kombu)
- 1/4 cup rice vinegar
- 3 tablespoons granulated sugar
- 1 teaspoon fine sea salt
I learned how important the rice variety is while perfecting my Japanese Curry Chicken Recipe, since both dishes rely on that same short grain, sticky texture.
Kitchen Equipment Needed
None of this equipment is fancy, but a couple of these tools genuinely make the process easier and give you better results.
- Fine mesh strainer, for rinsing the rice
- Rice cooker or a heavy bottomed pot with a tight fitting lid
- Small saucepan, for warming the vinegar mixture
- Wooden sushi oke or hangiri, a wide shallow bowl for mixing and cooling the rice
- Rice paddle (shamoji), for folding the seasoning into the rice
- A fan or a piece of cardboard, for cooling the rice quickly
Read Also: Chinese Dumplings Recipe
Recommended Products for This Recipe
These are a few products I personally use and recommend after years of making sushi rice at home, and they genuinely make the process smoother and more consistent.
1. Zojirushi Neuro Fuzzy Rice Cooker
This rice cooker has a dedicated sushi rice setting that cooks the rice with exactly the right amount of moisture for that signature sticky yet distinct texture.
It also keeps rice warm without drying it out, which is handy if you’re prepping for a sushi party.
It’s a splurge, but it earns its spot on the counter.
2. Lundberg Sushi Rice
Lundberg’s short grain rice is grown specifically for sushi, and the grains cook up plump and glossy every time.
I keep a bag of this on hand whenever sushi night is on the calendar.
It rinses clean and cooks evenly, which takes a lot of the guesswork out of the process.
3. Marukan Rice Vinegar
This brand of rice vinegar has a clean, mellow tang that doesn’t overpower the rice the way some cheaper vinegars can.
It’s the vinegar I reach for every single time I season sushi rice. A little goes a long way, so one bottle lasts a while.
4. Wooden Hangiri Sushi Tub
The wide, shallow shape of a wooden hangiri lets steam escape quickly while you fold in the seasoning, which is the secret to that glossy, non mushy texture.
The wood also helps absorb excess moisture from the rice as it cools.
It’s a small investment that makes a noticeable difference.
5. Bamboo Rice Paddle Set
A proper rice paddle lets you fold the seasoning through the rice without smashing the grains, which is easy to do with a regular spoon.
This set is inexpensive and lasts for years. It’s one of those small tools that’s easy to overlook until you don’t have one.
This same attention to ingredient quality is what took my Karaage Japanese Fried Chicken from good to great, so it’s worth applying here too.
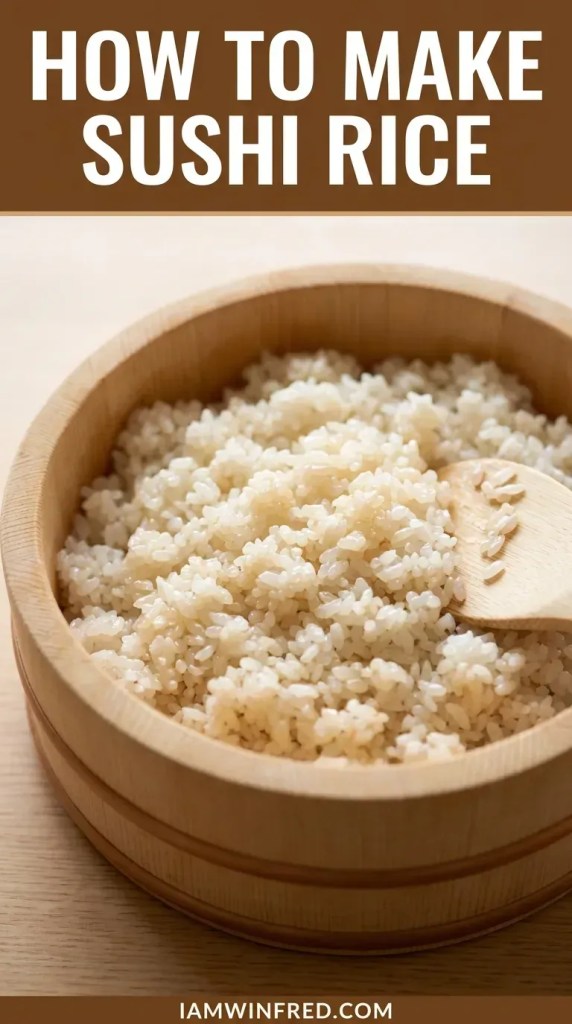
Step-by-Step Instructions: How to Make Sushi Rice
1. Rinse and Soak the Rice
- Place the 2 cups of short grain sushi rice in a fine mesh strainer set over a large bowl.
- Rinse the rice under cold running water, swirling it gently with your hand, until the water runs mostly clear instead of cloudy white.
- This usually takes 3 to 5 rinses, so don’t rush it, since removing the excess starch is what keeps the finished rice from turning gummy.
- Once rinsed, let the rice drain in the strainer for about 20 to 30 minutes. This resting time lets the grains absorb a bit of moisture before cooking, which helps them cook more evenly.
2. Cook the Rice
- Transfer the drained rice to your rice cooker insert or a heavy bottomed pot.
- Add the 2 1/4 cups of cold water and the piece of kombu, if using.
- If using a rice cooker, select the white rice or sushi rice setting and let it run its full cycle.
- If cooking on the stovetop, bring the water to a boil over medium high heat, then immediately reduce the heat to the lowest setting, cover with a tight fitting lid, and simmer for 15 minutes without lifting the lid.
- Remove the pot from the heat and let it sit, still covered, for another 10 minutes so the rice can finish steaming.
- Discard the kombu, if used, before moving on to the next step.
3. Make the Sushi Vinegar
- While the rice cooks, combine the 1/4 cup rice vinegar, 3 tablespoons sugar, and 1 teaspoon salt in a small saucepan.
- Warm the mixture over low heat, stirring often, just until the sugar and salt fully dissolve. This should take about 2 minutes.
- Do not let the mixture boil, since you’re only trying to dissolve the sugar and salt, not cook the vinegar.
- Remove the saucepan from the heat and set the vinegar mixture aside to cool while the rice finishes cooking.
4. Season the Rice
- Transfer the hot cooked rice to your wooden hangiri or a large, wide, shallow bowl. A wide surface area is important here, so avoid using a deep pot.
- Drizzle the cooled vinegar mixture evenly over the surface of the rice.
- Using your rice paddle, fold the vinegar through the rice with slicing, cutting motions rather than stirring, which would mash the grains and make the rice gummy.
- As you fold, fan the rice with your other hand or ask someone to fan it for you. This cools the rice quickly and gives it that glossy sheen sushi chefs are known for.
- Keep folding and fanning for about 8 to 10 minutes, until the rice has cooled to room temperature and every grain looks glossy and separate.
5. Cool and Rest the Rice
- Cover the seasoned rice with a clean, slightly damp cloth or paper towel to keep it from drying out while you finish prepping your other sushi ingredients.
- Do not refrigerate the rice at this stage, since cold temperatures firm up the starches and ruin that soft, sticky texture.
- Use the rice within 4 to 6 hours of making it for the best flavor and texture.
You might also enjoy: Baked Teriyaki Chicken Recipe
Tips for The Best Sushi Rice
A few small details separate good sushi rice from great sushi rice, and most of them come down to technique rather than ingredients.
- Rinse the rice until the water is nearly clear. Skipping this step is the number one cause of gummy sushi rice.
- Use a wide, shallow bowl for seasoning the rice instead of a deep pot, since the extra surface area helps the rice cool faster.
- Fold, don’t stir, when mixing in the vinegar, using gentle cutting motions with your rice paddle.
- Weigh your rice and water with a digital kitchen scale if you want more consistent results batch after batch.
- Never refrigerate finished sushi rice, since it hardens the starches and dulls both the texture and flavor.
- Season the rice while it’s still hot, since warm rice absorbs the vinegar mixture far better than cooled rice.
The same principle of seasoning while hot is what makes my Asian Glazed Chicken Thighs Recipe so flavorful too.
Serving Suggestions
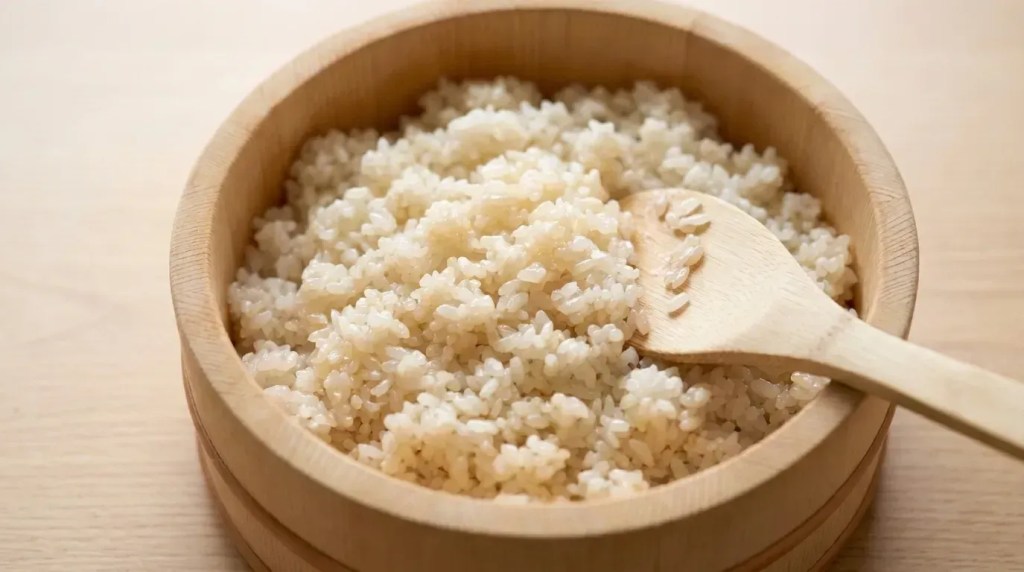
Sushi rice is endlessly versatile once you have a batch ready, so don’t feel like you have to roll sushi to enjoy it.
It works just as well as the base for a quick rice bowl as it does for a full sushi spread.
- Top it with sliced avocado, cucumber, and your favorite protein for a simple poke style bowl
- Use it to make classic maki rolls with nori and your favorite fillings
- Shape it into nigiri and top with thin slices of raw or cooked fish
- Serve it alongside a bowl of Miso Soup for a full, comforting Japanese style meal
- Pair it with grilled or roasted vegetables for an easy, lighter dinner
Read Also: Miso Soup
Variations of Sushi Rice
Once you’ve mastered the basic recipe, there’s plenty of room to play around with flavor and even the rice you use as your base.
- Brown sushi rice: Swap in short grain brown rice for a nuttier flavor and more fiber, though the texture will be slightly less sticky.
- Black or purple rice sushi: Mix in a small portion of black rice for a dramatic color and slightly chewier bite.
- Extra tangy rice: Increase the vinegar slightly if you prefer a sharper, more pronounced tang.
- Low sugar version: Cut the sugar by half for a more savory, less sweet finished rice.
- Cauliflower sushi rice: Blend the seasoned rice with steamed, riced cauliflower for a lighter, lower carb take.
This same spirit of experimenting with a classic base is exactly what inspired my Japanese Clear Soup Recipe.
Storage and Reheating
Sushi rice is best enjoyed fresh, but you can store leftovers if needed, keeping in mind the texture will change slightly once it’s been chilled.
- Store leftover sushi rice in an airtight rice storage container in the refrigerator for up to 2 days.
- To bring it back to a softer texture, sprinkle the rice with a little water and microwave it in short bursts, fluffing with a fork between each one.
- Avoid refreezing sushi rice once it’s been seasoned, since the vinegar mixture doesn’t hold up well after thawing.
- For meal prep purposes, it’s best to store unseasoned cooked rice and season it fresh right before serving.
Another favorite for planning ahead: Teriyaki Chicken Sheet Pan Dinner, which also reheats beautifully for lunches during the week.
Nutritional Facts
These values are approximate and will vary slightly depending on the exact brand of rice and vinegar you use.
- Calories: approximately 210 per serving
- Carbohydrates: approximately 46g
- Protein: approximately 4g
- Fat: approximately 0g
- Sugar: approximately 6g
- Sodium: approximately 320mg
I noticed a similar clean nutritional profile when developing my Asian Turkey Meatballs Recipe, which also leans on simple, whole ingredients.
Health Benefits of Key Ingredients
Sushi rice might feel like a simple carbohydrate, but a few of its ingredients bring more to the table than you might expect.
Rice vinegar in particular has a long history as both a flavoring and a mild digestive aid.
- Short grain rice: Provides quick, easily digestible energy and is naturally gluten free.
- Rice vinegar: Contains acetic acid, which may support healthy digestion and blood sugar balance.
- Kombu: A natural source of iodine and minerals that also adds a subtle savory depth to the rice.
- Sea salt: Supplies trace minerals along with the sodium needed for basic electrolyte balance.
You might also enjoy: Honey Soy Glazed Salmon
FAQs About Sushi Rice
1. What kind of rice should I use for sushi rice?
Short grain Japanese rice is the traditional choice for sushi because of its naturally sticky texture.
Medium grain rice can work in a pinch, but avoid long grain varieties like jasmine or basmati, since they won’t hold together properly.
2. Why is my sushi rice mushy?
Mushy sushi rice usually means the grains weren’t rinsed enough before cooking, or too much water was used.
It can also happen if the vinegar mixture is stirred in too aggressively instead of gently folded.
3. Can I make sushi rice ahead of time?
Sushi rice tastes best within a few hours of being made, since the texture starts to firm up as it sits.
If you need to prep ahead, cook the plain rice in advance and season it fresh closer to serving time.
4. Do I have to use kombu?
Kombu is optional, but it adds a subtle savory depth that plain water alone won’t give you.
If you don’t have any on hand, the rice will still turn out well without it.
5. Can I refrigerate leftover sushi rice?
You can refrigerate leftover seasoned sushi rice for up to 2 days, though the texture will firm up considerably.
A quick sprinkle of water and a short burst in the microwave will help soften it back up before serving.
Another favorite: Spring Vegetable Stir Fry

Sushi Rice
Ingredients
- 2 cups short grain sushi rice 400g
- 2 1/4 cups cold water 540ml
- 1 small piece dried kombu optional, about 2×3 inch piece
- 1/4 cup rice vinegar 60ml
- 3 tablespoons granulated sugar 38g
- 1 teaspoon fine sea salt 5g
Equipment
- Fine-mesh strainer for rinsing the rice
- Rice cooker or heavy bottomed pot with a tight fitting lid
- Small saucepan for warming the vinegar mixture
- Wooden sushi oke or hangiri a wide shallow bowl for mixing and cooling the rice
- Rice paddle (shamoji) for folding the seasoning into the rice
- Fan or piece of cardboard for cooling the rice quickly
Method
- Place the rice in a fine mesh strainer and rinse under cold running water, swirling gently, until the water runs mostly clear, about 3 to 5 rinses. Let drain for 20 to 30 minutes.
- Transfer drained rice to a rice cooker or heavy pot. Add cold water and kombu. Cook using the sushi rice setting, or bring to a boil, reduce heat to lowest, cover, and simmer 15 minutes. Let sit covered 10 minutes off heat, then discard kombu.
- Combine rice vinegar, sugar, and salt in a small saucepan. Warm over low heat, stirring often, just until dissolved, about 2 minutes. Do not boil. Set aside to cool.
- Transfer hot rice to a wide shallow bowl. Drizzle vinegar mixture evenly over rice. Fold with a rice paddle using slicing motions while fanning the rice. Continue 8 to 10 minutes until rice cools to room temperature and looks glossy.
- Cover seasoned rice with a clean damp cloth to prevent drying. Do not refrigerate. Use within 4 to 6 hours for best flavor and texture.
Notes
- Rinse the rice until the water is nearly clear. Skipping this step is the number one cause of gummy sushi rice.
- Use a wide, shallow bowl for seasoning the rice instead of a deep pot, since the extra surface area helps the rice cool faster.
- Fold, don’t stir, when mixing in the vinegar, using gentle cutting motions with your rice paddle to avoid mashing the grains.
- Weigh your rice and water with a digital kitchen scale for more consistent results batch after batch.
- Never refrigerate finished sushi rice, since it hardens the starches and dulls both the texture and flavor.
- Season the rice while it’s still hot, since warm rice absorbs the vinegar mixture far better than cooled rice.
- For brown sushi rice, swap in short grain brown rice for a nuttier flavor and more fiber, though the texture will be slightly less sticky.
- For a low sugar version, cut the sugar by half for a more savory, less sweet finished rice.
- Store leftover sushi rice in an airtight container in the refrigerator for up to 2 days. Sprinkle with water and microwave in short bursts to soften.
- For meal prep, store unseasoned cooked rice and season it fresh right before serving.
Private Notes
Tried this recipe?
Let us know how it was!Conclusion
Once you’ve made sushi rice from scratch, it’s hard to go back to the store bought version.
It takes a little patience, but the payoff is a bowl of rice with real flavor and that unmistakable glossy shine.
Give this recipe a try this week and let me know how your sushi rice turns out in the comments below.
If you make it, I’d love to see it, so feel free to share your photos here.
Recommended:
- Honey Garlic Salmon Recipe
- One Pan Dumpling Bake
- Teriyaki Chicken Casserole
- Stir Fry Sauce Recipe
- Teriyaki Sauce Recipe


